RELATED POSTS
Other posts you may be interested in
It is difficult to choose a chandelier from hundreds of options. When this challenging phase is complete, another challenge awaits you; mounting of the chandelier. If you are going to install the chandelier by yourself then you should read this article.
Cut the power off. First of all, you should cut the power where you mount the chandelier. Although switching off the switch is often enough, we recommend that you fully lower the fuse. Only switching off the switch does not provide full protection to prevent potential electrical shock.
Read all the instructions. Read the manufacturer’s instructions that came out of the chandelier’s box carefully before starting the mounting. According to the chandelier you bought there may be differences to pay attention.
Mount the chandelier. Today, chandeliers are usually packaged in dismounted form. Therefore, you need to assemble parts of the chandelier before mounting. Assemble the parts, but do not install the bulbs, we will do this in the final step.
Remove the old one. Before demount the old chandelier, pay attention to the places of the cables. Take a photo if necessary. This will prevent you from making mistakes when connecting the power to your new chandelier.
Place the new chandelier. Today, most of the chandeliers have a hanger hole on it. By this hole, the weight of the chandelier is carried by the hook Screw on the ceiling. If there is no hook screw on the ceiling, you must first mount it. When drilling holes for the hook screw, be careful to open it from the opposite direction of the cable to avoid damaging the cable. Some chandeliers have a base plate. First, the base plate is mounted on the ceiling, then the chandelier is screwed onto this plate.
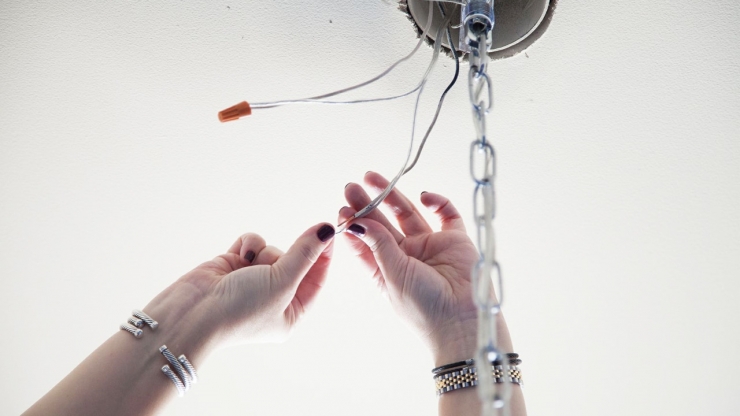
Make the electrical connection. After you have mounted the chandelier, you can make the electrical connection. 2 or 3 cables are usually left on the ceiling for the chandelier connection. 2 cable means phase and neutral for a single switch. 3 cables include 2 Phase 1 neutral on the binary switch. In this way, the lighting can be controlled separately. The direction of the cables in the dual cable is not important. In three-way cable, the different colored cable can be considered neutral however, it is necessary to verify it with the test light.
Replace the bulbs. At the end of all the procedures, replace the bulbs, open the fuse and turn on the lights by a switch. Therefore, you can check whether there is a problem.
We recommend that you have a person with you in all these processes and that you receive his or her help. Chandeliers are usually heavy so one person can mount the other while holding them. In this way, you are protected from unwanted accidents.


COMMENTS
MAKE A COMMENT